Spaghetti Bridge Challenge
From DT Online
What to Make:
Design and build a bridge out of (uncooked!) spaghetti to carry a load of 1kg across a gap of 500mm using as little spaghetti as possible. The bridge must be wide enough to include a 50mm wide thin card roadway which will allow a model vehicle (i.e. 1/50th scale approximately) to roll freely along it.
Note: The card roadway and model car need not be included in the final test weighing.
What to Use:
- Any variety of spaghetti may be used but not macaroni (tubular pasta) or lasagne (sheet pasta)
- Any suitable adhesive may be used but not sellotape or any other adhesive tapes.
Safety Point! A Hot Glue-Gun, Balsa Cement and Epoxy have each proved effective but care must be taken to follow safety advice when using such adhesives.
Things to think about:
Spaghetti is a brittle material and very unforgiving if loaded incorrectly. Samples of spaghetti can be tested to establish that it has a U.T.S. of around 15N/mm2 and has a Young's Modulus similar to aluminium. It may perform quite well if used in Tension as a Tie but is likely to fail by Buckling if subjected to Compression as a Strut (press a length of spaghetti down onto a hard surface to see this).
Note: If you note the length and diameter of spaghetti used, press down on to small scales and take a reading when it starts to buckle, sufficient data will be recorded to be able to confirm the Young's Modulus of spaghetti - see Euler's Buckling Equation.
Some ideas:
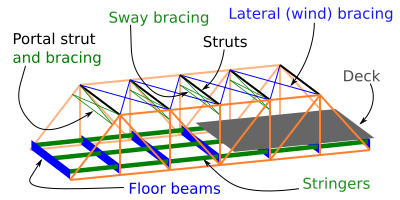
Research Common Bridge Types and famous Truss Bridges in particular (e.g. Sydney Harbour Bridge;Golden Gate Bridge; Silver Jubilee Bridge) and learn about the many variations of truss design.
Ways of Making:
Make sketches of bridge ideas and try to work out where the forces will act, estimate their size and whether they are in Compression or Tension.
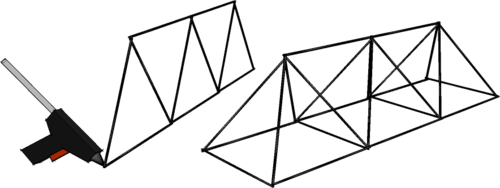
When subjected to Compression, spaghetti will need to be bundled together or formed into Trusses. Bundling will result in a much heavier Strut than building a Truss even if only spot-glued every few centimetres. For strength, overlap joints when gluing together a Truss rather than trying to use a Butt Joint. Badly glued joints are a potential point of failure.
Draw your bridge design full-size (e.g. using squared paper) and use this to set out and glue together the separate Truss Frames required before gluing them together and enclosing the roadway.
Testing Final Design:
- Accurately weigh the completed bridge (i.e. to a 1/10th of a gram if possible).
- Support the finished bridge as shown ensuring that the gap between supports is exactly 500mm (e.g. use blocks of wood or house bricks for the supports).
- Suspend the hanger from a slotted mass set below the centre of a 100mm x 50mm piece of thin Ply or MDF which is resting on top or inside the bridge on the centre of the roadway as shown.
- Add the slotted masses slowly and gently to the hanger until the specified load of 1kg has been achieved (or not!). Take care to protect the surface under the bridge in case of collapse.
The winner is the lightest bridge which successfully spans the gap, allows a car to roll along it and carries the load as specified.
Activity: Once completed, continue to load your model until it collapses then divide its breaking load by its self-weight using the same units - you should aim for a result between 1000 and 2000!
- Similar Structures can be modelled using the Construction Kits listed in the Truss Bridges article or Stripwood Technology Materials and tools described in Stripwood Technology Tools.
 |
 |
 |
 |
 |
 |
 |
 |
 |
 |
| Bamboo Plant Support Canes |
Split Cane Plant Supports |
Artstraws |
Coloured Tissue Paper |
PVA Washable School Glue |
Spaghetti |
Glue Guns |
Coloured Gaffer Tape |
Cable Ties |
Elastic Bands |


