Scales: Difference between revisions
From DT Online
(Created Scales) |
mNo edit summary |
||
| Line 2: | Line 2: | ||
Drawing at full-size is said to be drawn at a ratio of 1 : 1 ''(i.e. | Drawing at full-size is said to be drawn at a ratio of 1 : 1 ''(i.e. 1 unit in reality is drawn as 1 unit on paper)''. For a drawing to be half-size 1 unit in reality would be equal to ½ size units on paper, so would have a ratio of 1 : 2, quarter-size would be 1 : 4 and so on. The ratios are derived from a '''Representative Fraction''' which is given as: | ||
Revision as of 11:27, 22 February 2015
A Scale can be used if a full-size (or true-size) drawing would be too big to fit on the paper being used or where drawing at larger than full-size is useful to show greater detail (e.g. when designing a circuit board). They can also be used to convert units of measurement (e.g. objects measured in inches drawn full-size, but in millimetres on the drawing).
Drawing at full-size is said to be drawn at a ratio of 1 : 1 (i.e. 1 unit in reality is drawn as 1 unit on paper). For a drawing to be half-size 1 unit in reality would be equal to ½ size units on paper, so would have a ratio of 1 : 2, quarter-size would be 1 : 4 and so on. The ratios are derived from a Representative Fraction which is given as:
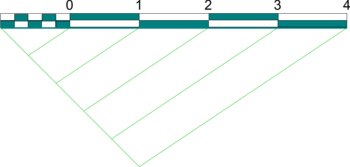
| Plain Scale |
|
|
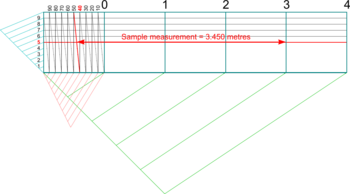
| Diagonal Scale |
|
Note: There are occasions when drawing accurately to scale can provide more than a good representation, or model, of the finished product. Scale drawings can be measured from and used to transfer sizes of a complex shape on to a large sheet of material for example, but in general and with the advent of CAD, measuring off an Engineering Drawing is not as common as it once was - and has never been satisfactory for really accurate work.

