Odd-side Moulding: Difference between revisions
From DT Online
Created article |
mNo edit summary |
||
| Line 5: | Line 5: | ||
=====Description===== | =====Description===== | ||
'''Odd-side Moulding''' ''(aka '''Coping Out''')'' is most useful for parts that have no clear flat surface which would create a parting line but can also be used as a way of casting simple shapes for which making a split pattern might be considered excessive. | '''Odd-side Moulding''' ''(aka '''Coping Out''')'' is most useful for parts that have no clear flat surface which would create a parting line but can also be used as a way of casting simple shapes for which making a split pattern might be considered excessive. It is a useful technique also for replicating original ‘found’ objects. | ||
Revision as of 18:10, 6 November 2016

Description
Odd-side Moulding (aka Coping Out) is most useful for parts that have no clear flat surface which would create a parting line but can also be used as a way of casting simple shapes for which making a split pattern might be considered excessive. It is a useful technique also for replicating original ‘found’ objects.
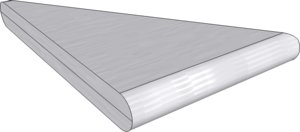
The Gnomon support bracket shown has only one curved edge and, although a split pattern would be the 'classic' approach, Odd-side Moulding will achieve the same end result. It will also serve to illustrate the Odd-side Moulding process.

Moulding the Odd-side
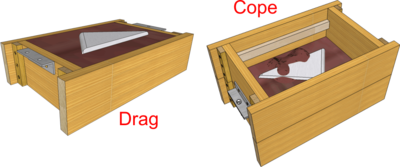
The Drag is first rammed up full with moulding sand and strickled off flat. The packed sand is then dug out to accommodate half the pattern (e.g. up to the half way line or up to a suitable curved face - if the latter then some extra sand may need to be built up around the pattern to create a curved joining face).
Moulding Tools are used to smooth everything off and Parting Sand added to stop the two halves of the mould sticking together. Add the Cope then ram up and strickle this off as normal for Sand Casting.

Completing the Mould
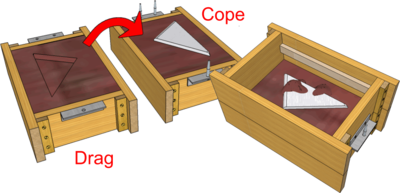
Separate the two halves of the Moulding Flask and ensure the pattern stays in the Cope - re-insert if necessary.
Knock out the temporary packing of sand in the Drag (this is the ‘odd side’) and re-assemble on to the upside down Cope.
Add Parting Sand, ram up the Drag and strickle off. Separate the two halves of the Moulding Flask again, cut Sprues and Gates and remove the pattern as for normal Sand Casting. Add a Runner Cup, vent, weight and pour.
Safety Point! Pouring molten metal is extremely dangerous!
- Ensure there are no trip hazards between the furnace and the moulding tray containing the flask.
- Make sure that any tools introduced into the melt (e.g. to remove Dross) are pre-heated and dry.
- Wear full face shield, leather gauntlets and apron.
- Use purpose made Crucible Tongs and Carriers to carry the Crucible to the moulding tray and pour.