Game Storage Box (Stripwood): Difference between revisions
From DT Online
Created article |
mNo edit summary |
||
| Line 1: | Line 1: | ||
[[File:GamePieces.png| | [[File:GamePieces.png|400px|right]] | ||
__TOC__ | __TOC__ | ||
| Line 74: | Line 74: | ||
{{Stripwood | {{Stripwood Materials Buyers Guide (1)}} | ||
Revision as of 14:08, 9 June 2017

Introduction
Board Games have been played in most cultures and societies throughout history. In addition to the Game Board itself, most Board Games involve the use of counters or 'playing pieces' and sometimes dice or spinners, cards. tokens and other 'props' all of which may need storage to avoid loss.
Storage Box using 'Stripwood'
Box Construction can involve a wide range of materials and techniques, including exotic timbers and sophisticated Jointing methods, but very satisfactory Game Storage Boxes can be made with a minimum of specialised equipment using Stripwood cut to length and glued together.

'Stripwood' Box Construction
The first step in designing and making any box or container is to measure carefully the items to be stored. This will provide the internal dimensions.
The Stripwood advocated by DT Online is 8mm square Softwood (although 10mm square can also be convenient for some purposes). This material thickness must now be added to the internal dimensions (and often 'rounded up' to make for ease of access when removing the board and pieces from the box).
- Draw the resulting box outline full-size (e.g. using squared paper),
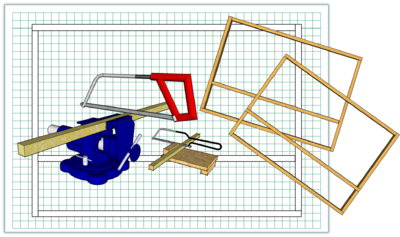
- Mark lengths of Stripwood off the full-size drawing and cut to size (e.g. using a Junior Hacksaw),
- Place the cut pieces on the drawing to check accuracy and method of assembly.
Assembling the box body
Cut sufficient pieces to make up the number of Stripwood frames needed to make up the depth of box body required.
Alternate Stripwood frames can be organised such that they create overlaps at the corners and other joining positions. Once all are glued together, the effect is to simulate a Bridle Joint or Comb Joint at each corner and where any cross rails are used.
Any spacing or packing pieces required to hold content in position, or stop them moving about too much, can simply be glued in place.

Hinging the lid
Both the bottom of the box body and a lid can be made out of either Thick Card, Thin Ply - or similar. It may be difficult to fix conventional Box Hinges to thin sheet materials but a strong fabric Adhesive Tape can be used to create a 'hinge' suitable for this purpose.
Hold the lid in position against the box body and wrap the Adhesive Tape around the edge to be 'hinged'.

Note: To ensure a good surface for the Adhesive Tape, it may be necessary to sand smooth and perhaps varnish the area in contact with the tape.
Methods of holding the lid closed can include:
- Velcro (e.g. positioned on top of the packing pieces),
- Magnetic Door Catches (e.g. locating on to a steel washer or similar glued to the lid underside),
- Elastic Bands pulled over the corners (e.g. looped around buttons glued to upper surface of lid or threaded through holes).
The top Stripwood frame can be modified if required, to build a gap or slot for example, to serve as a handle to open the lid
Box with removable lid
Cut sufficient pieces to make up the number of Stripwood frames needed to make up the depth of box body required but omit any cross pieces and do not glue the top frame to those under it.
Glue in position the box bottom, made out of either Thick Card, Thin Ply - or similar, and glue the separate top frame to card of ply to make the top.
Line the inside of the box body with a strip of thick card or thin ply - width equal to the required inside depth. This is known as a Bezel and will be used to locate the removable top lid. Add any cross-pieces and packing pieces required by gluing them in place.

Notes:
- MDF Discs which are pre-drilled are most useful if available, otherwise this might be done as preparation before using with younger children - alternatively a Hand Drill Stand could be used (if neccessary, adults or older children can cut them out of strips of MDF or Ply using a Holesaw).
- Dowels 4mm, 5mm, and 6mm are useful sizes for axles.
- Florist Wire is easily bent into shape whereas stiff wire, such as Brass Brazing Rod, is more suitable for connecting rods.


