Silversmith's Hammer
From DT Online
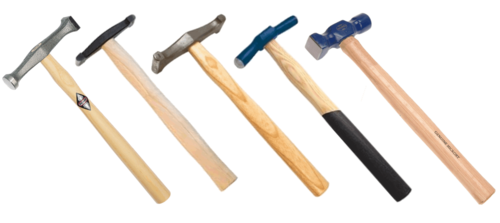
Description
Silversmithing involves forming and finishing metal sheet (usually Silver, Nickel Silver, Copper, Brass, Pewter or Gilding Metal) into hollow forms such as bowls, plates, goblets, vases and other similar decorative, ceremonial or household artefacts.
Products are formed by hammering the Annealed metal sheet into metal Doming Blocks or over Stakes then finished by lightly hammering the metal as it is held on to the polished surface of a Stake with over-lapping hammer strikes. This process is known as Planishing and serves not only to polish the surface but also Work-Hardens the Annealed metal sheet to give strength to the finished product.
Planishing can be taken literally to mean ‘make plane’ and its purpose is not to cover the surface with crude hammer marks. The general rule to achieve this is: ‘round to flat and flat to round’ when choosing which hammer head shape to apply to which surface of the Stake being used.
Features and Uses
| Planishing Hammer | Planishing is a finishing process for beaten metalwork used by Silversmiths and Coppersmiths to smooth out (or make ‘plane’) the surface imperfections left by metal forming processes. The metal is placed over the polished surface of a Stake, chosen to be a close match to the required final contour, and rotated or moved along slowly as light hammer blows are repeatedly applied to its surface. Planishing Hammers have a flat face and a slightly convex face and the rule is: round to flat or flat to round when choosing which to use. |  |
| Collet Hammer | These have faces which are slightly cylindrical, rather than domed or convex, and are used to ‘planish’ cylnders,rings or ‘collets’. Following the rule, round to flat or flat to round, the hammer shaft is held parallel to the axis of a cylindrical Stake when Planishing a vase for example. | 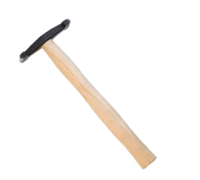 |
| Raising Hammer | Although appearing similar to a Collet Hammer, these are much sturdier and the head is slightly arced between its two faces. Discs of Annealed metal sheets (e.g. silver, brass, copper, or gilding metal) are held at an angle against a Raising Stake and beaten down onto it to raise it into a seamless bowl or goblet for example. The faces are slightly cylindrical but with well rounded edges to prevent their cutting into the soft metal sheet during the Raising process. | 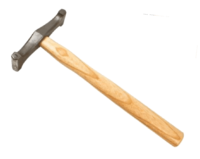 |
| Doming Hammer | These may be used in the first stages of a ‘Raising’ process to start off the hollow shape by beating the metal into a wooden former (or a Sandbag) with a Doming Hammer. | 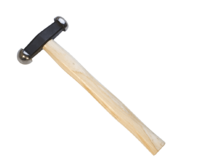 |
| Blocking Hammer | These have one round and one square face and are used for forming and shaping metal. The round face can be used to form metal into a Hollowing Block and the flat face used to true flanges surrounding a shallow tray after Sinking for example. The Blocking Hammer may be used to round out or flatten the bottom of the vessel from the inside after Raising has been completed. | 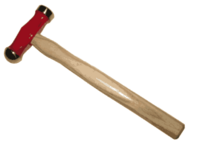 |
- 12oz Hammers (0.45kg) are a good useful size for general work in Design and Technology.
- Larger 2lb hammers (1kg) are used for heavier work such as Blacksmithing for example.
- Smaller hammers (e.g. 4oz and 8oz) are suitable for jewellery work and model engineering applications.
- Brick Hammers between 1lb and 1.5lb weight (450g to 700g) are suitable for school use and are available also with a Scutch Comb Chisel at one end which can be used for shaping brick and masonry.
- A 2lb Lump Hammer (0.9kg) is a good useful size for general work in Design and Technology and home maintenance tasks.
- 2lb to 4lb Sledge Hammers (1-2kg) are a suitable size for general forge-work in Design and Technology since hammers heavier than 4lb would be difficult for students to use.
 |
 |
 |
 |
 |
 |
 |
 |
| Ball Pein Hammer |
Blacksmiths Hammers |
Brick Hammer |
Claw Hammer |
Cross Pein Hammer |
Lump (or Club) Hammer |
Pin Hammer |
Sledge Hammer |